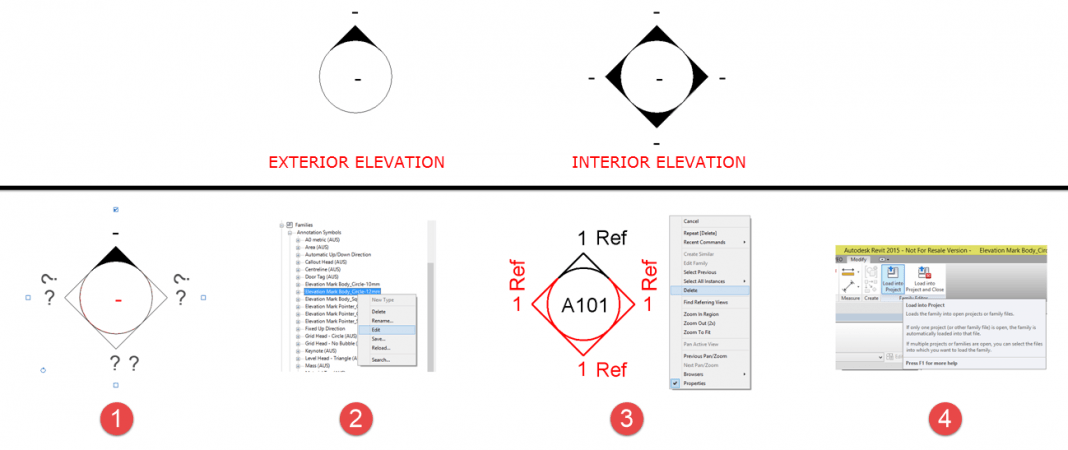
It’s common for most companies to graphically differentiate between exterior and interior elevations.
In these cases the exterior elevation markers will typically be a variation of their interior. This results in the exterior elevations also containing check boxes for creating the other 3 directions. This is how it functions by default in the out-of-the-box template files.
But those other 3 direction check boxes can be removed from the exterior marker, making it omnidirectional.
Steps
- Identify which exterior elevation marker Family you want to change.
- Select the Family in the Project Browser, right-click for the menu, then Edit.
- Delete three of the elevation marker Pointer Families. This then leaves the one direction.
- Load it back into Project and overwrite the existing.
You now have an omnidirectional exterior elevation marker.
Note, this process only applies if you already have an exterior elevation marker Family. To make a new exterior elevation marker, additional steps not listed above are required.


