
It’s been a while since my last smart home update. Six months to be exact, and has provided an opportunity to test and refine the base automation system. During this time, the system has expanded with the addition of more sensor devices, allowing the gathering of even more environmental data for temperature and door/window states. Besides the new devices, the performance of the underlying hub has also received substantial upgrades.
In this post, we’ll take a look at the devices, and hardware setup. And in following posts, covering more details on how the devices are being used.
Sensors
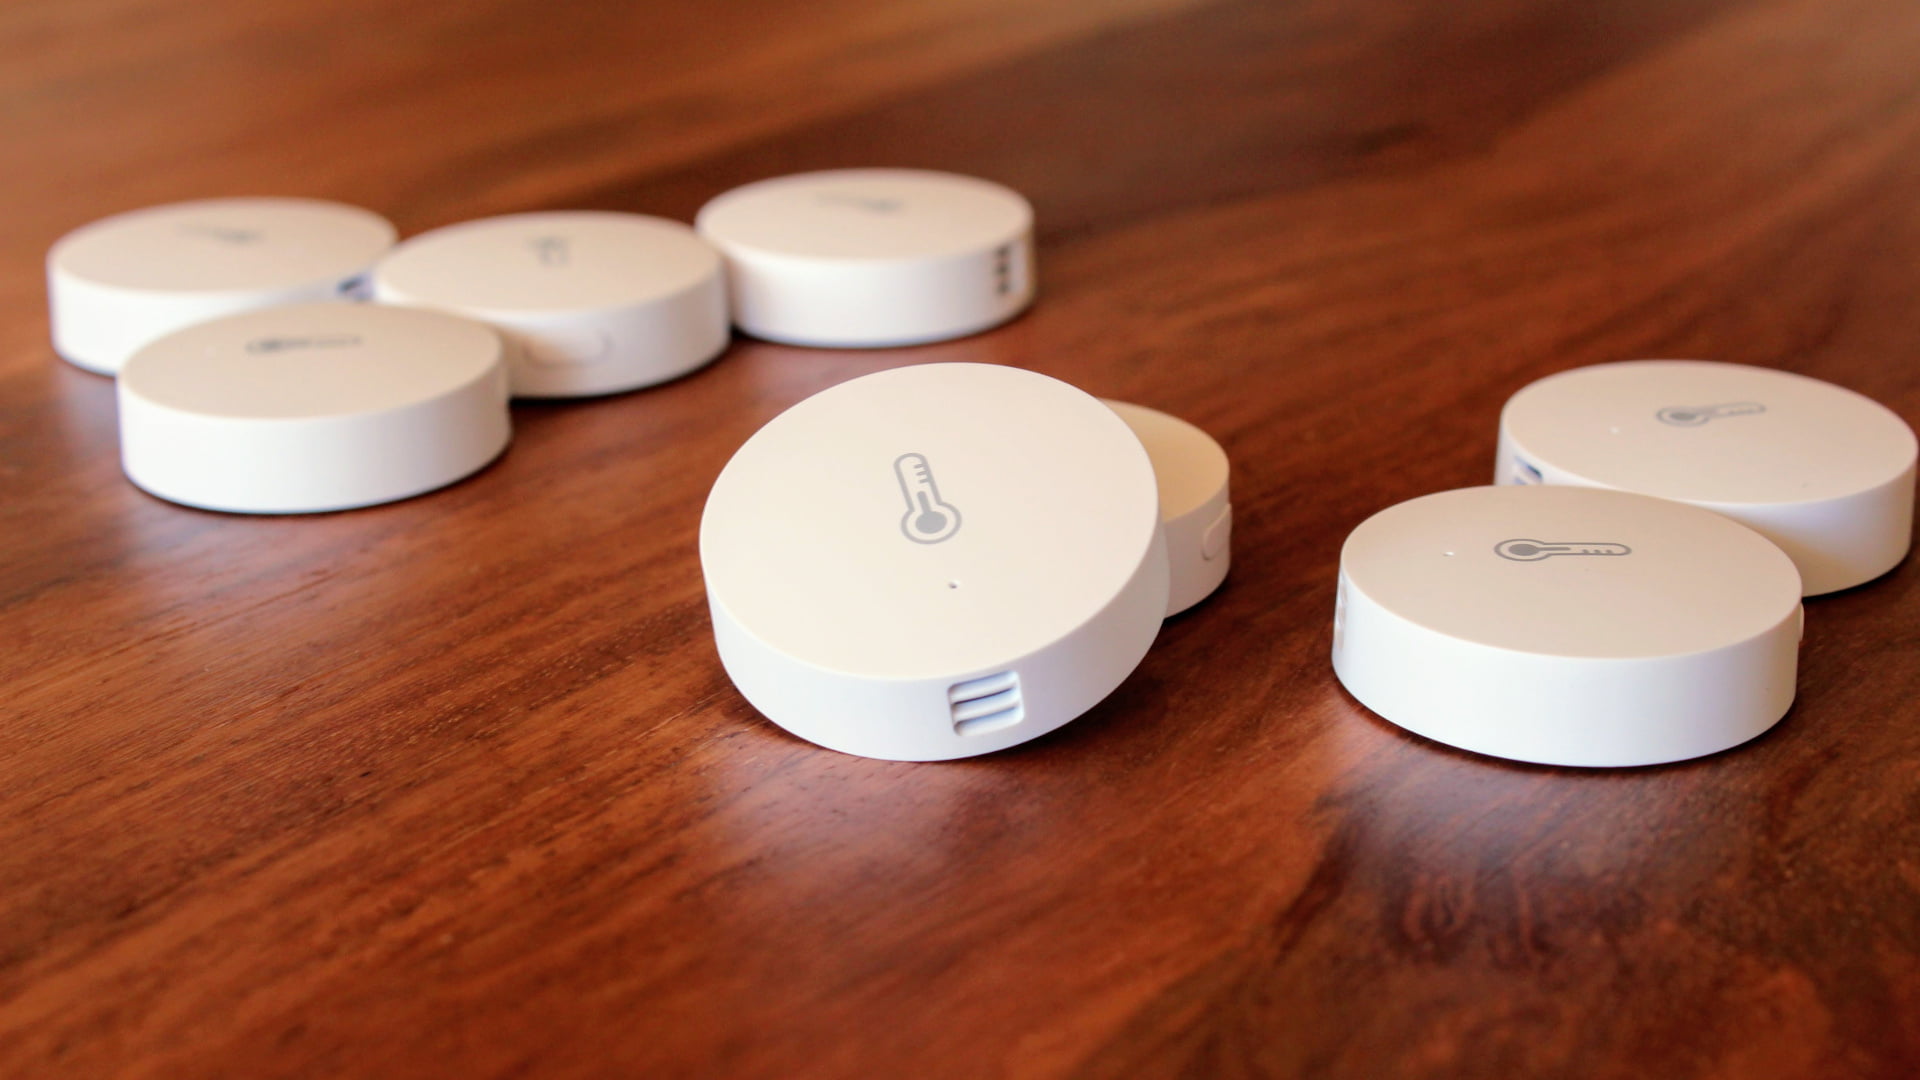
Chinese manufacturer Xiaomi is well known for their mobile phone products. But they also make other consumer electronics, including smart devices. Their products are also considered extremely affordable and with a high build quality, making them excellent value for money. On average a device only costs AU$10-12 each, compared to other brands which could cost up to four times that amount.
Smart device technology, such as these, have come some ways over the past few years. It means low-powered wireless devices can now easily run off button-sized batteries. Xiaomi claims that their devices can run for up to 2 years. Given that I have been running some devices for four months with minimal drop in charge, I’m likely to agree. The included batteries weren’t at full charge, but have only lost about 15-20% during that time.
These specific devices do need an accompanying Xiaomi Gateway to operate. The gateway acts as a central connection point, and from here it connects through to the main home automation hub. One other reason for choosing Xiaomi devices is the integration with Home Assistant. Connecting it to Home Assistant allows for the Xiaomi platform to communicate with other device platforms. Cross-platform device communication is after all how the home becomes smarter.
The Xiaomi sensor devices which I have integrated are:
- Multi-functional Gateway
- Aqara Temperature Humidity Sensor (this is the 2nd generation, where-as I’m using the 1st generation)
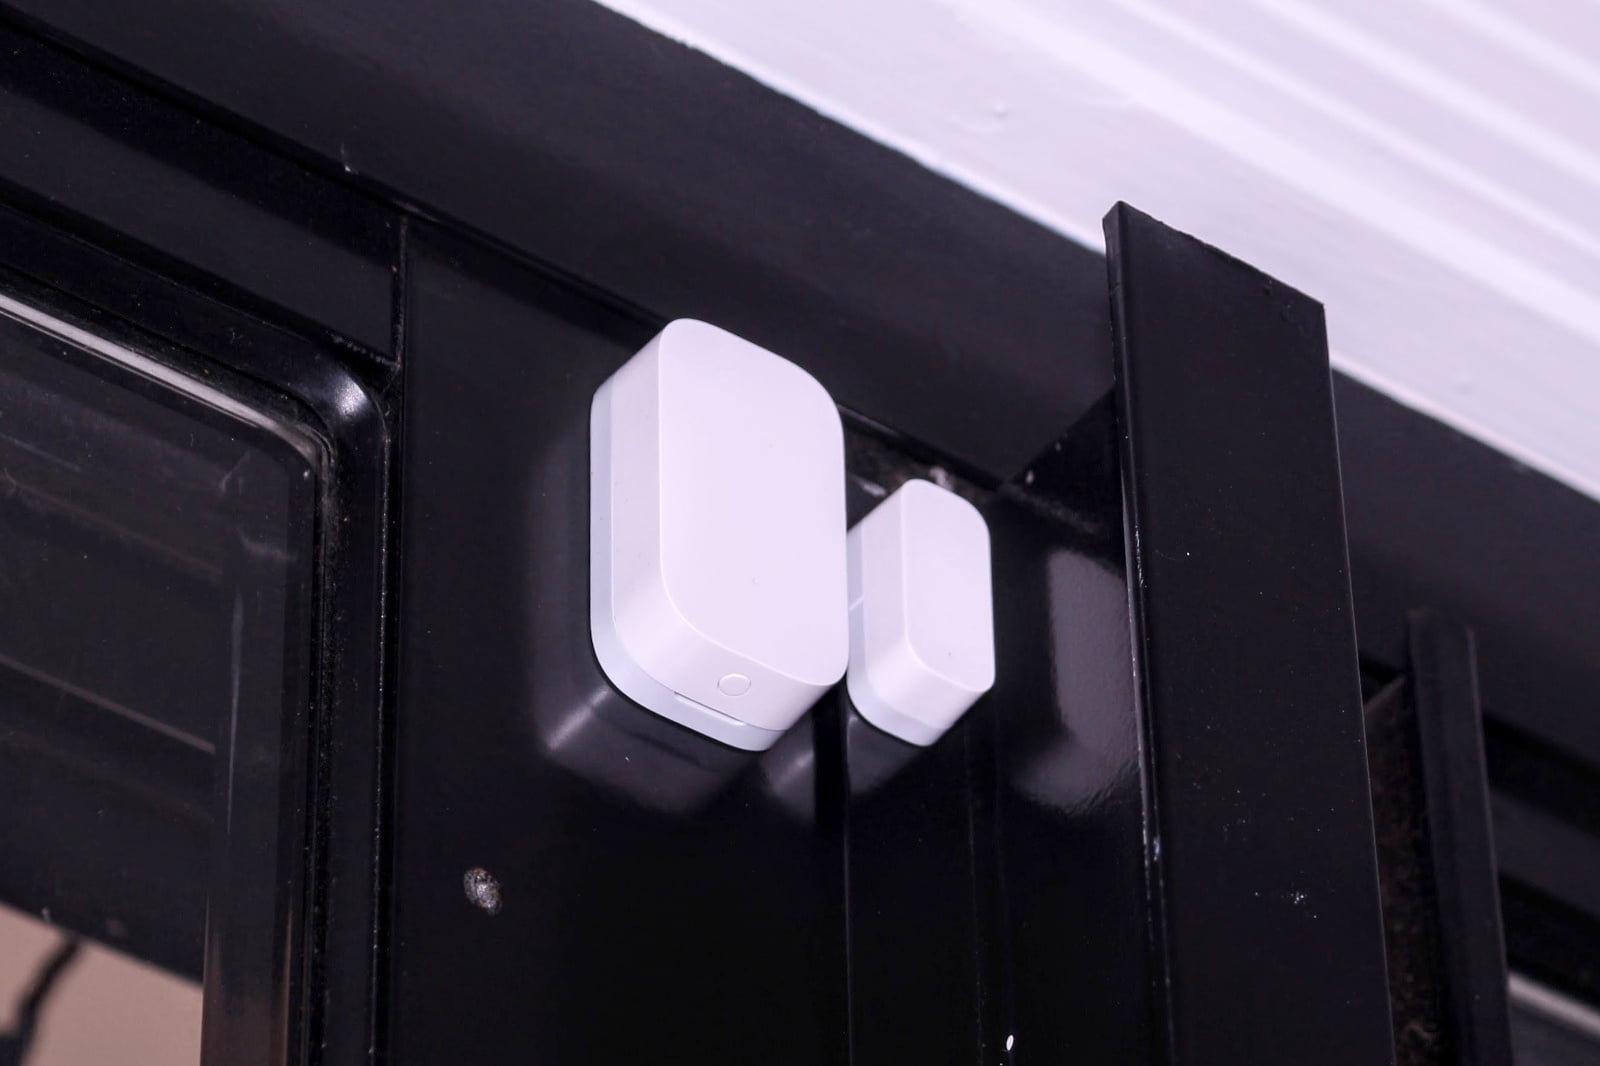
- Aqara Window Door Sensor
- Aqara Human Body Sensor
- Smart WiFi Socket – ZigBee Version
Xiaomi products can’t be purchased in many locations directly outside of China. Although, the importation of them from certain online stores is pretty straightforward.
Hub hardware
My Home Assistant (HA) hub started out running on a Raspberry Pi; a low-powered computer. While still a suitable hardware platform to run from, it does mean that HA development is slower. This is noticeable when rebooting after config changes, and through the user interface.
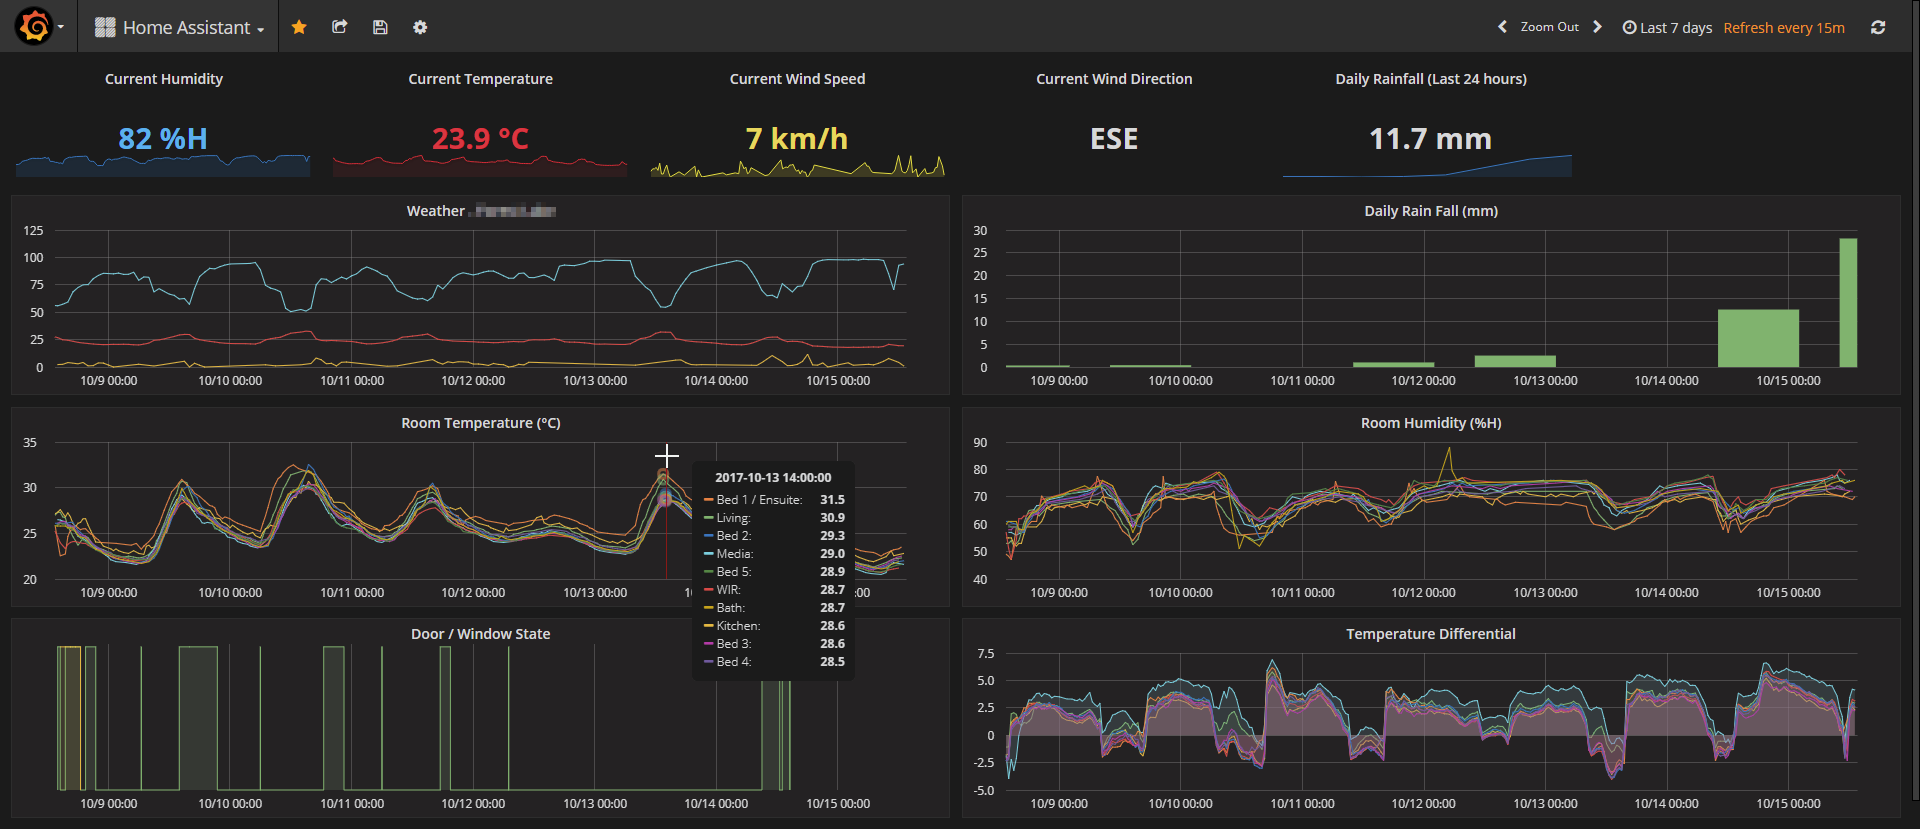
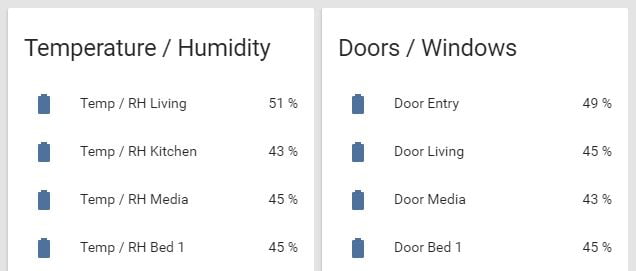
I am also capturing sensor data through extra software, InfluxDB and Grafana. Until I was confident they were reliably recording the data I was after, they were previously running on an old laptop.

So rather than running two computers, they were merged into a single dedicated home automation server. Having before had good experiences with Intel NUCs this seemed a logical way to go. NUCs have a small form factor, are reasonably powerful, and yet remain relatively energy efficient.
For my NUC hardware setup I went with:
The installed operating system is a headless version of CentOS Linux, with Webmin chosen as a browser-based admin interface. Wanting the server to be as flexible as possible, Docker was chosen to manage the applications.
Both CentOS and Docker were completely foreign to me and came with a moderate learning curve. Having a dockerized server is something which had interested me for a while so I decided to take the plunge. The extra effort has paid off, and the server has been running smoothly since.